


Recently, my company set up a local server for demoing apps to clients. I chose the Ubuntu operating system and installed Docker directly on the OS without a VM. Docker is a powerful tool for containerizing apps, but it can be difficult to manage using the command line. Portainer is a graphical user interface (GUI) for Docker that makes it easy to create, manage, and deploy containers.
What is Portainer?
Portainer is a free and open-source GUI for Docker. It is a web-based application that runs on your Docker host. Portainer provides a single interface for managing all of your Docker containers, images, networks, and volumes.
Portainer is a great choice for developers and system administrators who want to manage Docker containers without having to learn the command line. It is also a good option for businesses that want to make Docker more accessible to their employees.
Prerequisites
Before you can install Portainer, you need to have the following:
A server running on Ubuntu (or other distro)
Docker and Docker Compose installed
Installing Portainer
The first thing I did was create the volume for Portainer
docker volume create portainer
This will create a volume named portainer that will be used to store Portainer's database and configuration files.
Then run the Portainer container
docker run -d -p 8000:8000 -p 9443:9443 --name portainer --restart=always -v /var/run/docker.sock:/var/run/docker.sock -v portainer:/data portainer/portainer-ce:latest
This will run the Portainer container with the following parameters:
-d- Run the container in detached mode.-p 8000:8000- Map port 8000 on the host to port 8000 in the container. This is a port to expose tunneling, so the edge agent can talk to the server.-p 9443:9443- Map port 9443 on the host to port 9443 in the container. This is the default port for the Portainer web UI.--name portainer- Give the container the nameportainer.--restart=always- Restart the container if it stops unexpectedly.-v /var/run/docker.sock:/var/run/docker.sock- Mount the Docker socket from the host into the container. This allows Portainer to communicate with the Docker daemon.-v portainer:/data- Mount theportainervolume from step 1 to the container. This will store Portainer's database and configuration files.portainer/portainer-ce:latest- Use the latest version of the Portainer Community Edition container image.
Then check whether the Portainer container is running or not with
docker ps
This will list all of the running containers on your system. If the Portainer container is running, you should see an output similar to the following:
CONTAINER ID   IMAGE                           COMMAND        CREATED         STATUS         PORTS                                                                                            NAMES
1a9e46e4ca55   portainer/portainer-ce:latest   "/portainer"   9 seconds ago   Up 3 seconds   0.0.0.0:8000->8000/tcp, :::8000->8000/tcp, 0.0.0.0:9443->9443/tcp, :::9443->9443/tcp, 9000/tcp   portainer
Initial Setup
Once the Portainer container is running, you can open the Portainer web UI by opening a web browser and navigating to https://<server_ip>:9443.
Your browser will likely display a warning that the website is not secure. This is because the SSL certificate for the Portainer server is not valid. You can safely ignore this warning.
In some cases, the Portainer server may timeout when you first try to access it. If this happens, you can try restarting the Portainer container.
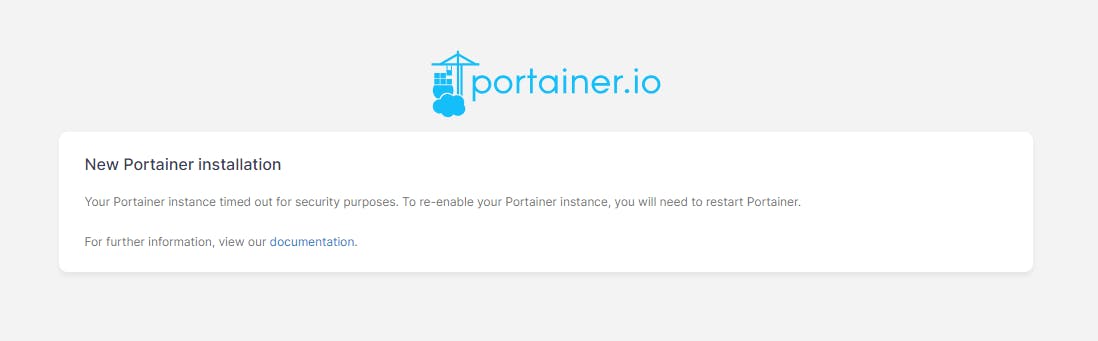
docker restart portainer
You will be prompted to create a new administrator account. Enter a username and password, and then click Create user.

Once you have created an administrator account, you will be logged in to Portainer. Click Get Started to begin managing your Docker containers.

Portainer will automatically detect your local environment and set it up for you. You can view your environments by clicking Home in the left-hand navigation menu.

The local environment is the default environment and is used to manage the containers on your local server. Click on the local environment or you can use the Live connect button then go to the Containers menu to see the containers running on your local server.
Conclusion
In this article, you learned how to install Portainer. You also learned how to complete the initial setup of Portainer and view your environments.
In the next article, we will discuss how to create containers, stacks, volumes and networks using Portainer, Insha Allah. We will also cover some advanced topics, such as deploying containers to production.
Thanks for reading! I hope this article has been helpful.